Top 4 Recommended Webcam Recorder Software for your Mac's Built-In Camera
Photo by Jakob Owens on Unsplash
Nowadays, everyone can record videos from their laptop easily. If you have a MacBook, you will have a built-in camera that you can use to record videos.
This article focuses on the top 4 free programs for the Mac that record video from your built-in camera, which are iMovie, Photo Booth, QuickTime Player, and Restream. Which of these four programs is the best and the most convenient to use?
Using Photo Booth 📷
Photo Booth is a software application published by Apple for taking pictures and videos and is available on all Macintosh computers.

Photo by Apple.
Taking a photo
- Open the Photo Booth app on your Mac.
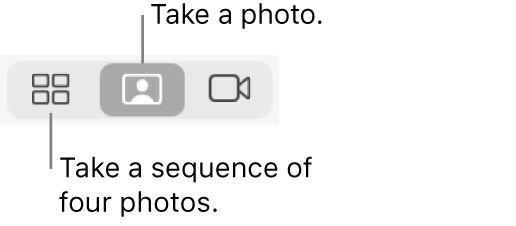
- In the bottom left of the window, click the
Take a still picturebutton to take a single photo, or click theTake four quick picturesbutton to take a sequence of four shots.
3. Click the Take Photo Button.
Photo Booth will automatically save the snapshot. To view the picture, simply navigate to the Pictures folder and open Photo Booth Library. You will see another folder called Pictures, open it, and you will see all the pictures you have taken using Photo Booth.
You may also apply effects to your picture by clicking on the effects button on the bottom-right part of the window.
Recording Video
- Open the Photo Booth app on your Mac.
- Click on the
Record a Movie Clipbutton.

3. To start recording, press the Record Video button
4. Click the Stop button when you are done recording.
Similarly, to view the video clip, go to the Pictures folder as mentioned previously.
Additional Settings
By default, Photo Booth has a three-second countdown after you press the Take Photo button until the photo is taken. Your screen flashes when the picture is captured. You can edit the settings to your preference by following these steps:
- Turn off the countdown: Hold down the Option key while clicking the
Take Photobutton orRecord Videobutton. - Turn off the flash: Hold down the Shift key while clicking the
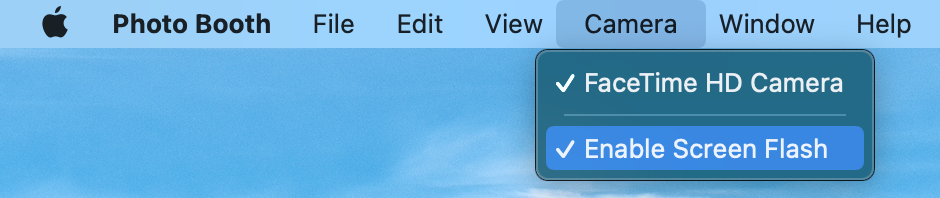
Take photobutton. - Change the flash setting: Choose
Camera->Enable Screen Flash
- Turn off both the countdown and the flash: Press and hold the Option and Shift keys simultaneously while you click the
Take Photobutton.
Using QuickTime Player 🎥
Similar to Photo Booth, QuickTime Player is a software application that Apple also developed. QuickTime Player allows you to edit the videos you have taken, which is a feature that is not available in Photo Booth.

Recording video
- Open the QuickTime Player app on your Mac.
- Choose
File->New Movie Recording. A green light will appear next to your built-in camera. - To change the video quality, you can click the
Optionspop-up menu and change the settings based on your preferences.
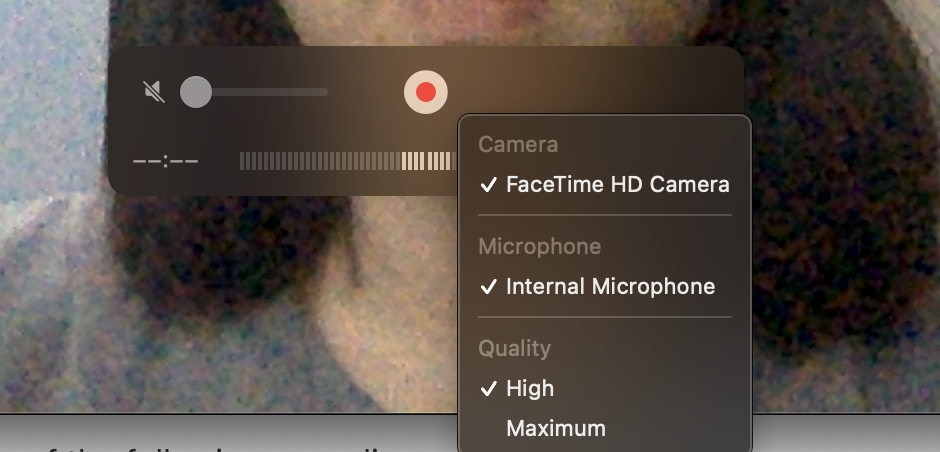
| Quality | Description |
|---|---|
| High | H.264 video and 44100 Hz AAC audio |
| Maximum | Apple ProRes 422 video and Linear PCM audio |
4. Click the Record button to start recording.
5. Click the Stop button when you have finished recording.
6. If you want to pause recording, click the Option key and the Record button simultaneously.
7. Choose File -> Save to save and name the video file.
The QuickTime Player app is slightly more complicated to use than the Photo Booth app. However, it gives you an option to record higher-quality videos.
Using iMovie 🎬
iMovie is a video editing software developed by Apple for Mac computers. Compared to QuickTime Player, iMovie has many more editing features, such as adding effects, modifying color settings, crop, and rotating video clips. However, this comes to the fact that this software is slightly more complicated to use.
Recording Video
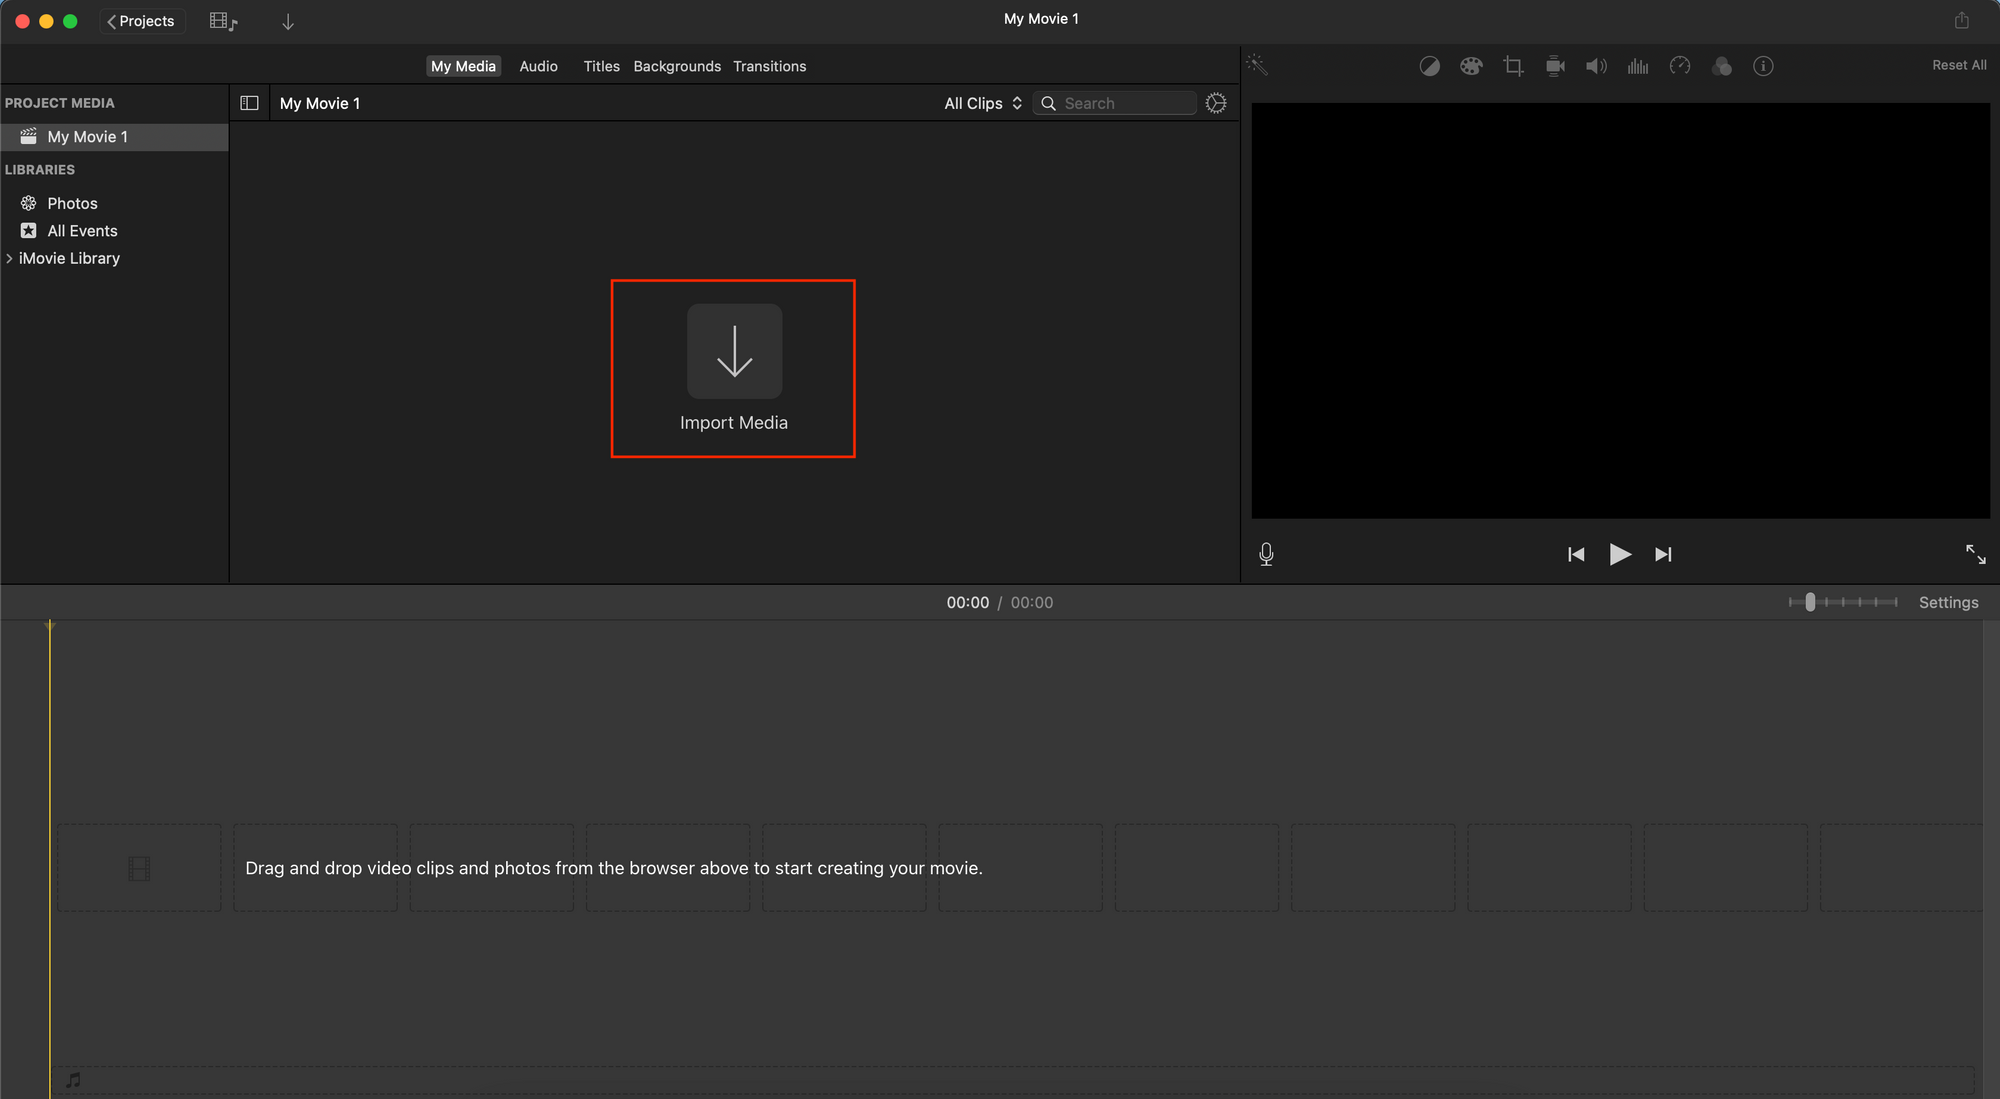
- Launch the iMovie app on your Mac.
- Click
File->New Movie - Press the downward arrow
Importbutton at the top of the application window.
4. Go to the Cameras section and select FaceTime HD Camera.
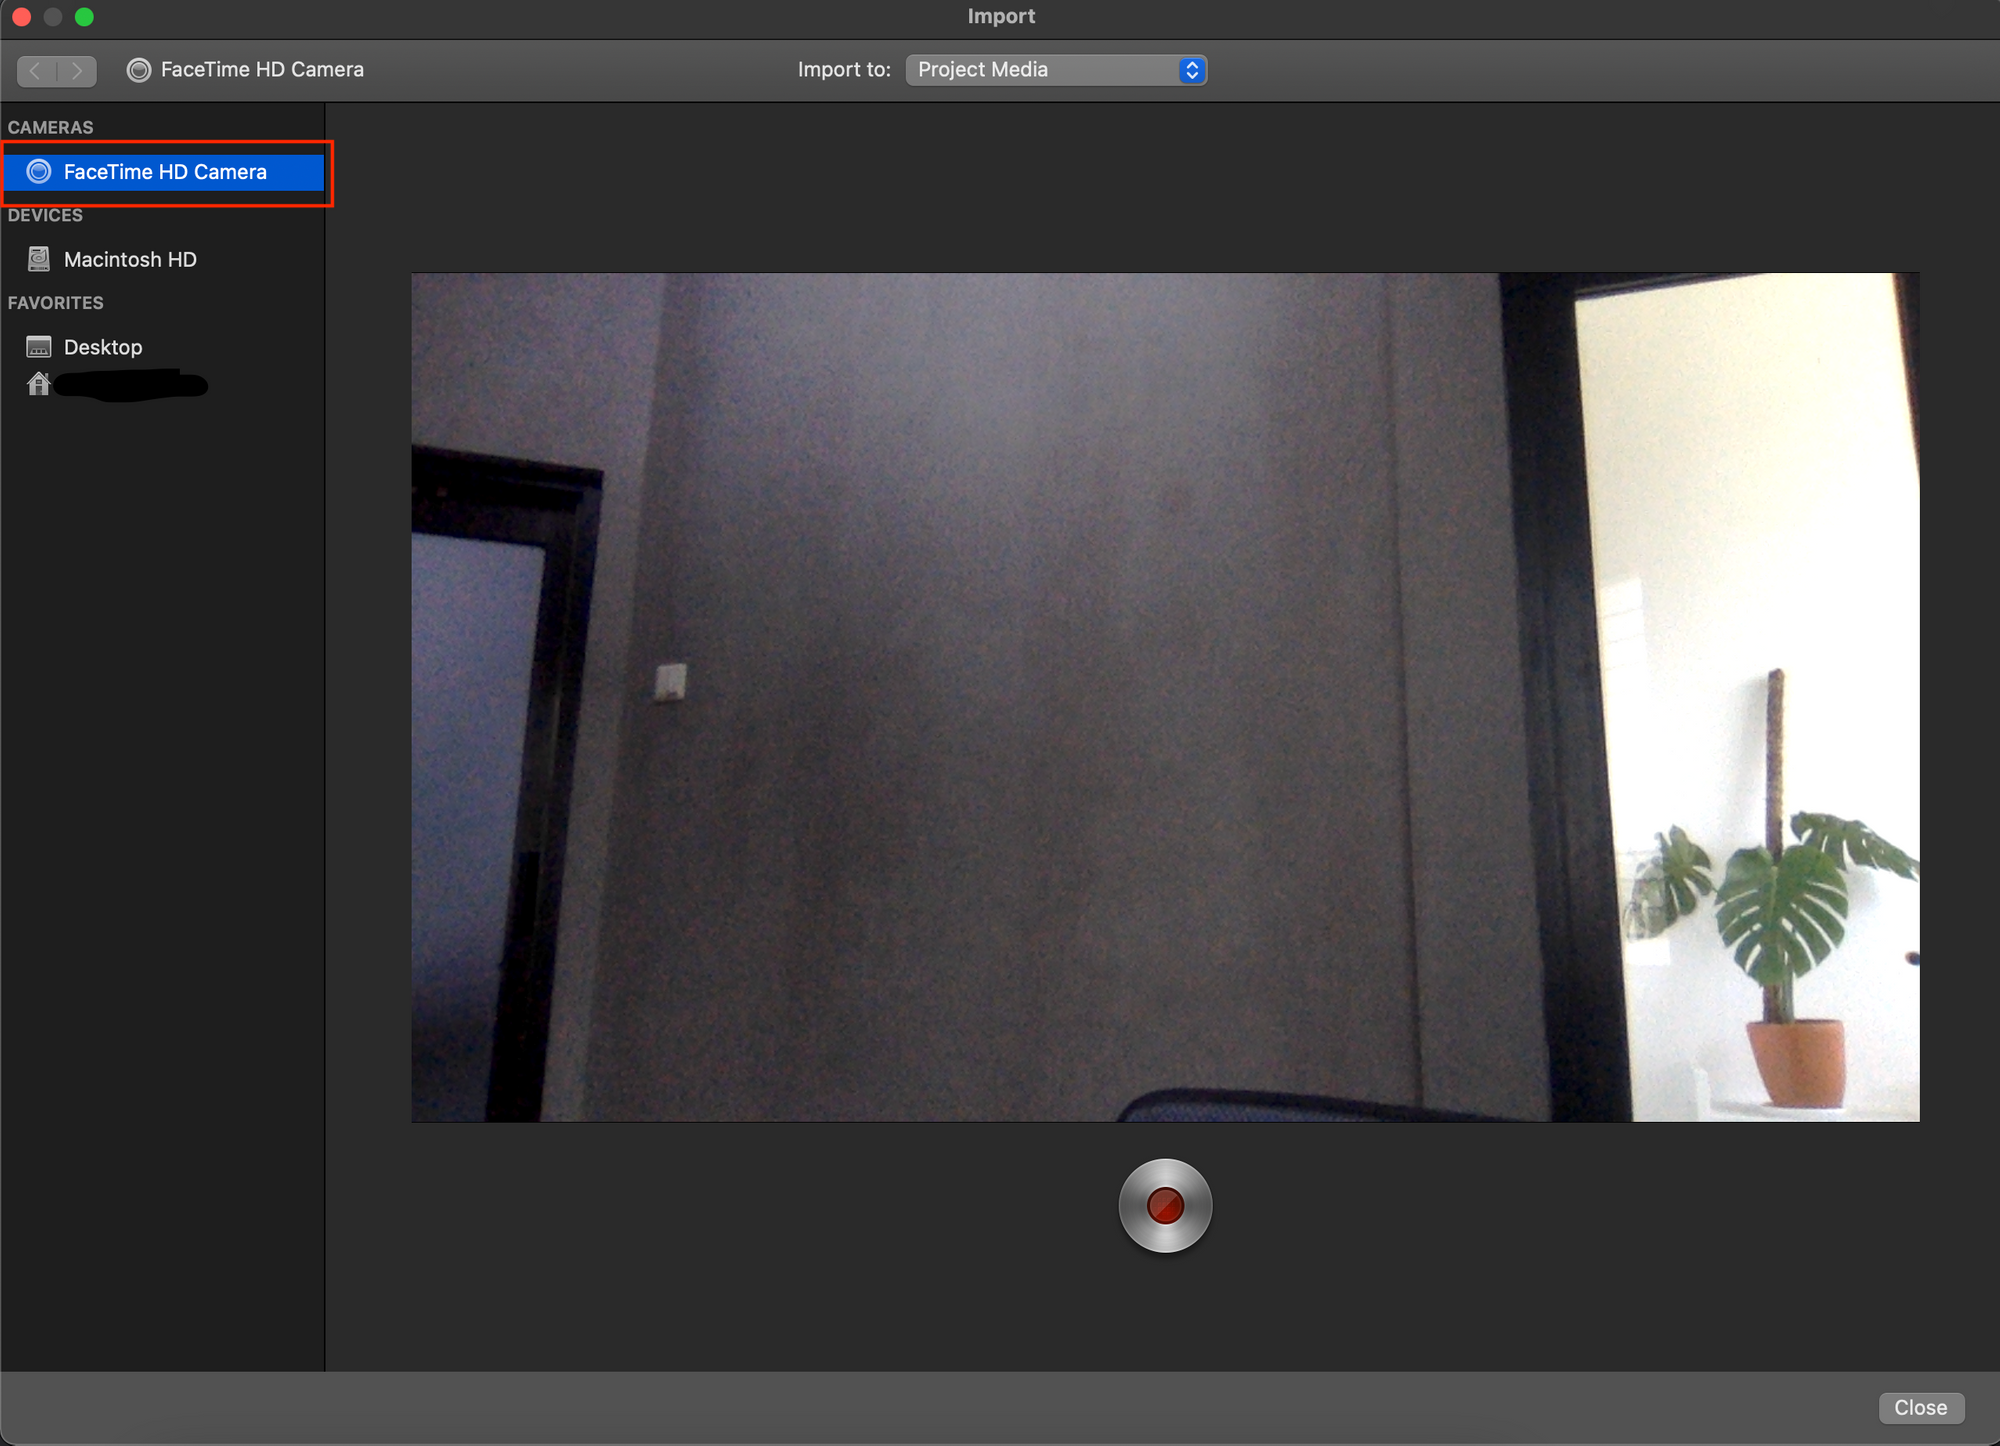
5. Click the Import to the drop-down menu and select the current project you want to put this video to.
6. Click the Record button to start recording.
7. To stop recording, press the Record button again.
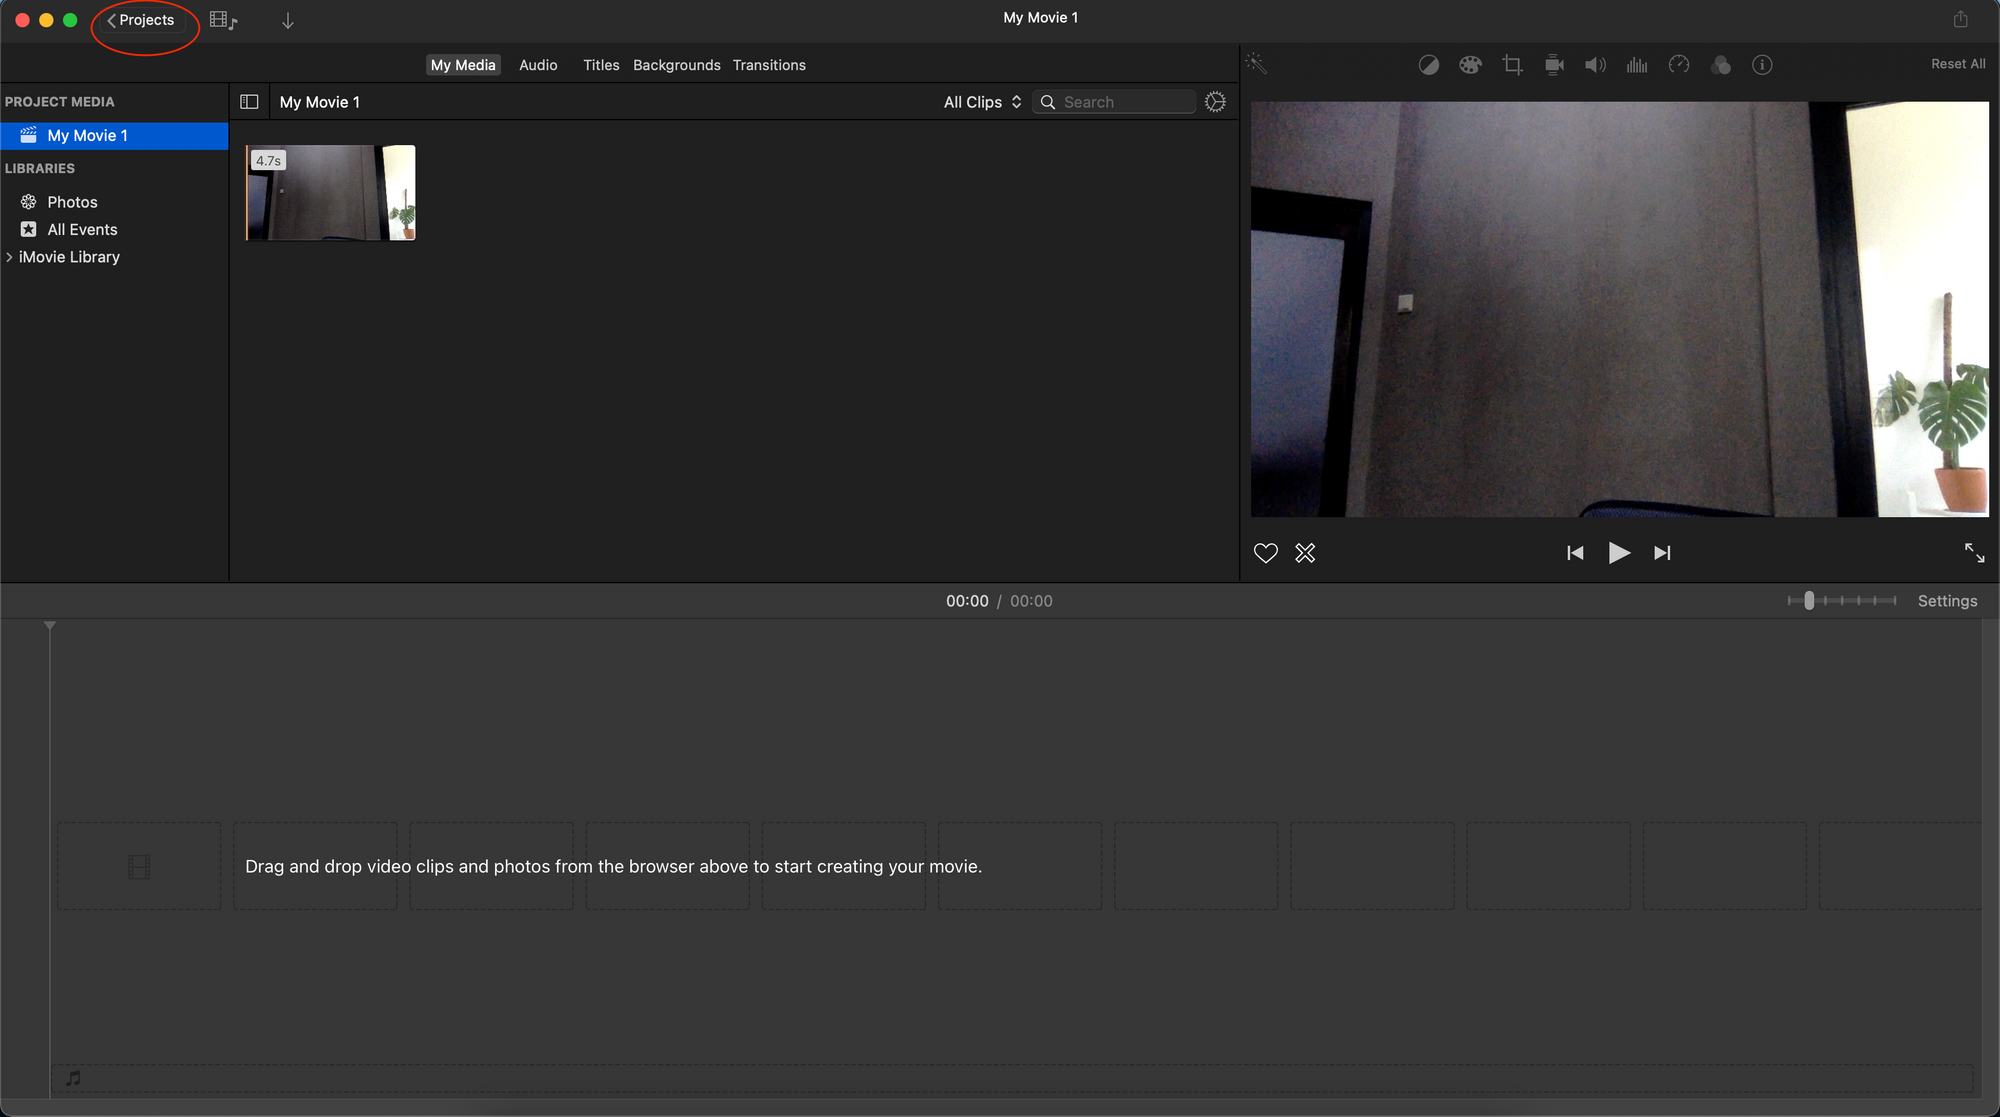
8. Press Close at the bottom of the screen to close the recording window.
9. Click Projects on the upper left side to save the recording and return to the main menu.
This process is pretty long and complicated than using Photo Booth or QuickTime Player. However, once you finished recording, you can do a lot of editing using iMovie, which you could not do using the other two applications.
Using Restream 🖥
Restream is a powerful and effective multi-streaming service that allows you to broadcast your live content to more than 30 streaming platforms simultaneously. To use Restream's Record Only feature — you will need a standard plan or higher to access this feature. Today, we're using their free trial version.
Recording Video
- Create an account with Restream here.
- Open this link to record your video.
- Click the
Start Recordingbutton on the top right corner to start. - To stop recording, press the
End Recordingbutton. - Press the
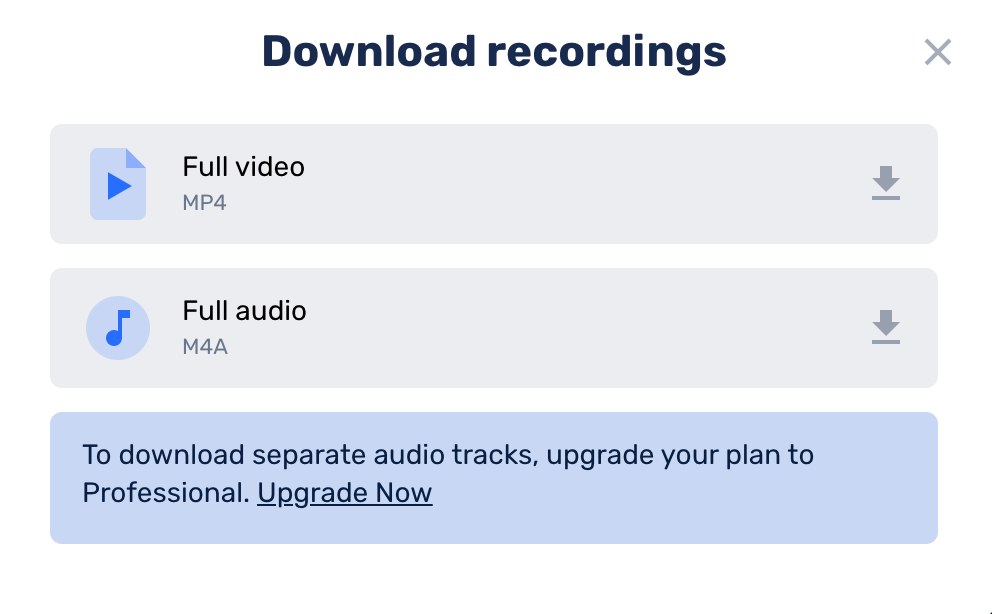
Download Recordingsbutton to download your video.
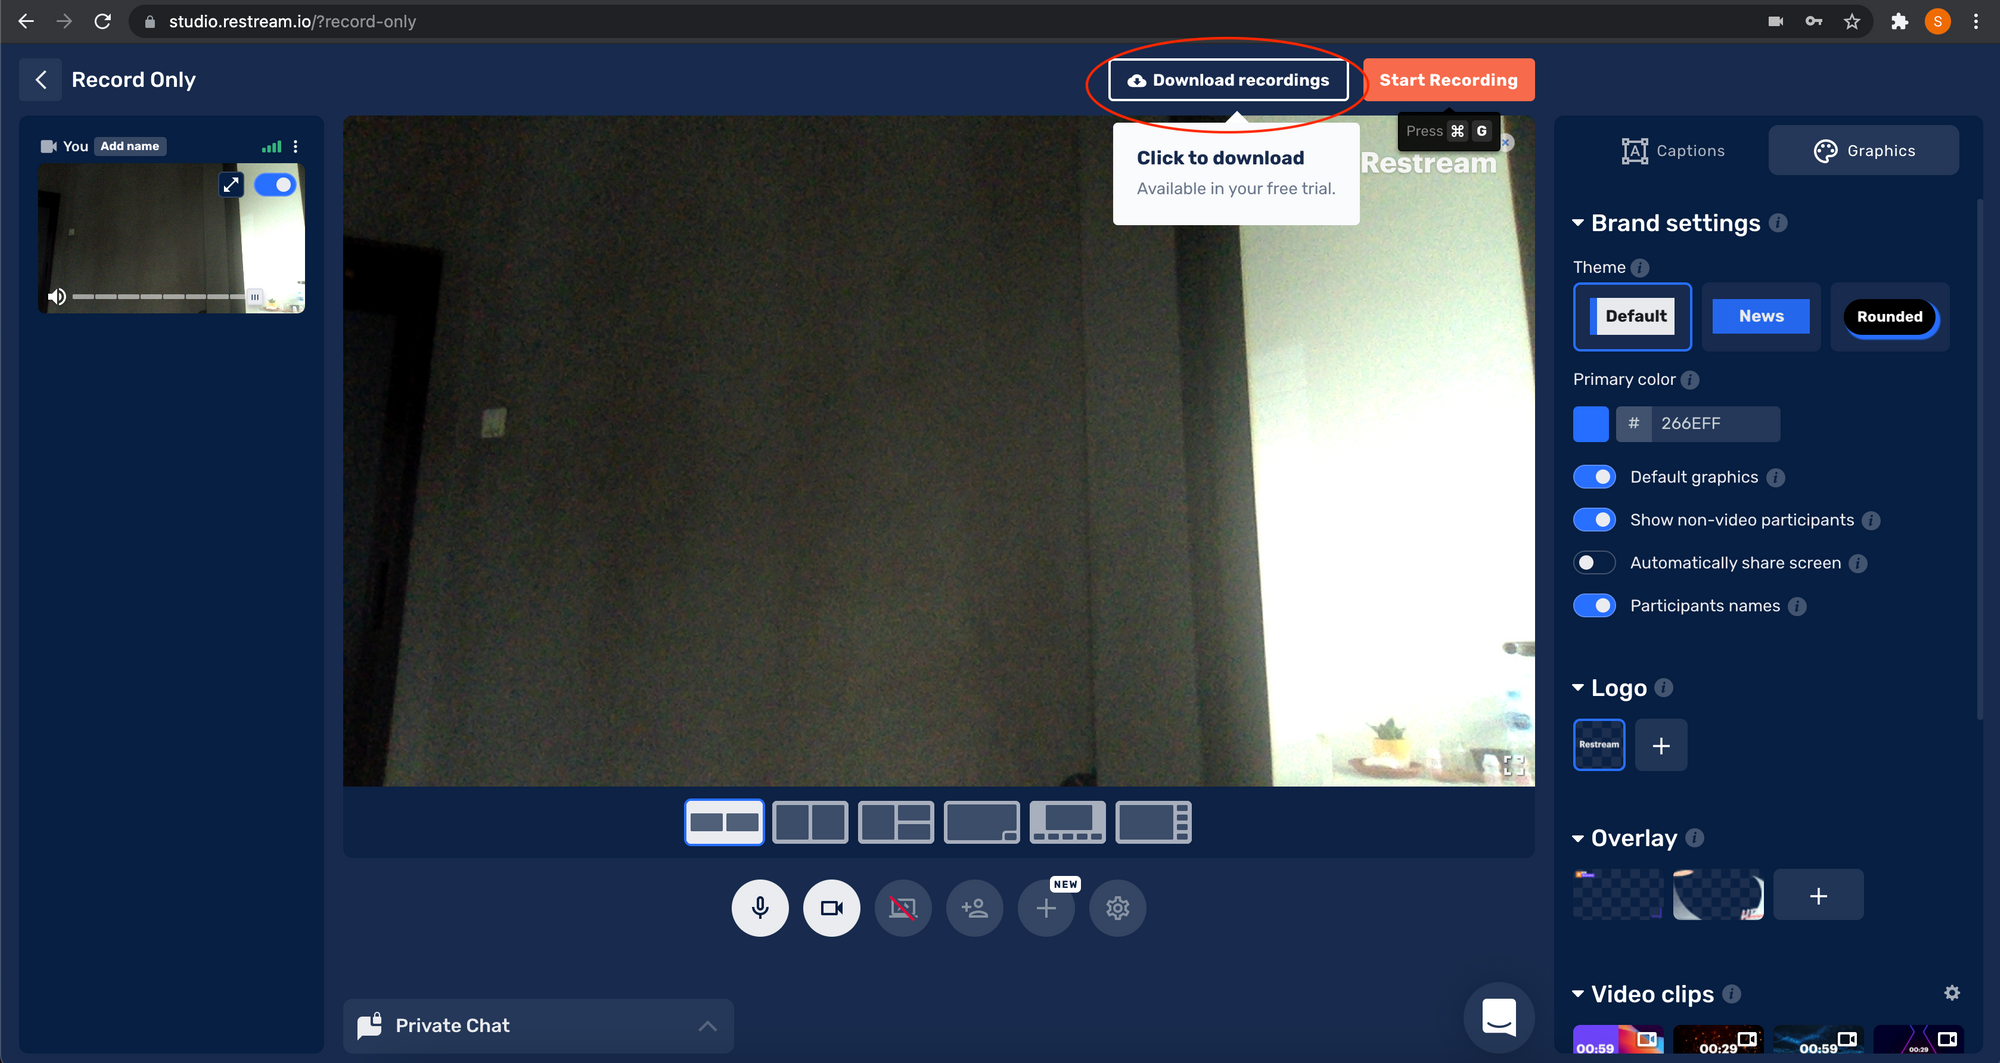
6. Choose Full Video as the file format.
Overall, Restream's process is extremely quick and easy to use. The only downside is that there's a Restream watermark on the upper right-hand side that you can't remove unless you upgrade to the paid plan. However, if you don't mind this small detail on your video, then we highly recommend recording using Restream.
Restream also has a free Multistreaming service where you can live stream simultaneously to multiple platforms (YouTube, a Facebook personal page, Twitter, LinkedIn, Twitch, and more.).
Higher Quality Videos
Due to its low resolution, videos captured by FaceTime HD Camera show grainy texture and unsharp appearance. If you feel that your built-in camera lacks the quality you desire, you could always upgrade to an external webcam that provides better quality. Most external webcams today have a resolution of at least 1080p or even 4k. It is a decent upgrade from your FaceTime HD Camera that only supports 720p and has a 1.2-megapixel camera.
We wrote an article on how to find a good webcam that can help you to choose. Below are some popular webcams that we have reviewed:
1080p Webcam:
- Logitech C930e
- Logitech C525
- AverMedia CAM 313
- Spedal HD Webcam
4k Webcam:
💡 Tip: You could check the quality of your webcam here.
Conclusion
| Photo Booth | QuickTime Player | iMovie | Restream | |
|---|---|---|---|---|
| Easy to use | ☑ | ☑ | ☒ | ☑ |
| Best editing features | ☒ | ☒ | ☑ | ☑ |
Photo Booth wins in terms of easiness to use because you can start recording the moment you launch the application. You won't need to click any other buttons or open any files. QuickTime Movie Player and Restream are also reasonably easy to use. iMovie, on the other hand, requires more steps to start recording.
Despite the lack of user-friendliness, iMovie has many useful editing effects that can be applied to the video. iMovie has features that include enhancing video color settings, crop and rotating clips, stabilizing shaky videos, adding transitions and subtitles, and speeding up or slowing down the video clip. These are all effects that are not available on Photo Booth and QuickTime Player (which only has the option of trimming a video).
In conclusion, the best software for you highly depends on your use case. If you wish to record a simple video with minimal or no editing, go for either Photo Booth or QuickTime Player. If you are planning to live-stream, then Restream is perfect for you and you can also upgrade to Restream's paid plan as it unlocks additional features. If you prefer to add a lot of effects to your video, then record your video using iMovie.